Let’s get you the answers right away. Here’s a quick summary of the five most common reasons solar lights fail — plus how you can fix them:
| Problem | Likely Causes | Quick Fixes |
| Light won’t turn on | Dead battery, switch off, sensor failure, wiring issue | Replace battery, check switch, clean/replace sensor, fix wiring |
| Light is dim or short runtime | Old battery, not enough sun, dirty panel, cold weather | Change battery, reposition panel, clean panel, adjust angle |
| Light stays on during day | Sensor failure, disconnected panel, wrong mode setting | Clean sensor, reconnect panel, reset mode, replace faulty parts |
| Light flickers or blinks | Loose wires, corrosion, low battery, faulty driver/sensor | Tighten contacts, clean corrosion, replace battery, check circuitry |
| Water or physical damage | Rain leaks, cracked panel, damaged parts | Dry unit, clean corrosion, seal cracks, replace broken components |
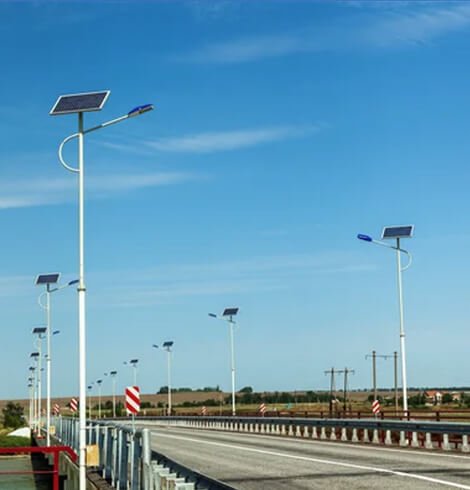
We’ve been making solar lights here in China for years, and we’ve seen it all. While modern solar lights are designed to last, they’re not immune to everyday wear and tear. In fact, most failures come down to just a few simple culprits: aging batteries, blocked sunlight, faulty sensors, or wiring issues.
The best part? Once you know what to look for, many of these problems are easy to fix — often with tools or replacements you already have on hand.
In the sections below, I’ll guide you through each problem one by one: how to check for it, what signs to look for, and exactly how to repair it so you can get your solar lights glowing again.
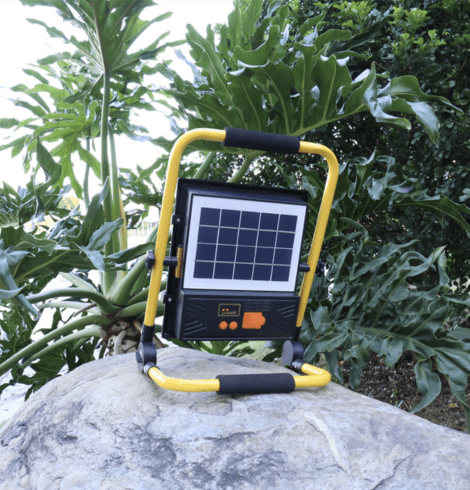
1. Entire Light Not Turning On
Let’s start with the most common issue: the solar light doesn’t turn on at all after dark. This means no power is reaching the LED. Here’s how to break it down, check the cause, and apply the fix.
1.1 Dead or Discharged Battery
The most common reason is a worn-out or fully discharged battery. Rechargeable batteries typically last 2–3 years or about 300–500 charge cycles. After that, they lose the ability to hold charge.

How to check:
Open the battery compartment and look for signs like leakage, corrosion, or loose placement. If you have a multimeter, test the voltage. A healthy NiMH AA battery, for example, should read between 1.2–1.4 volts. If the voltage is close to zero, the battery is no longer functional.
How to fix:
Replace the battery with a new one of the same type and rating. Make sure you match the battery type (e.g., NiMH or Li-ion) and capacity.
1.2 Power Switch Off or Battery Pull-Tab Left In
Sometimes the problem is simple: a switch left in the OFF position or a plastic pull-tab that was never removed on a new light. These prevent the circuit from closing, so no power reaches the LED.
How to check:
Look for the power switch on the light housing and confirm it’s in the ON position. For new installations, open the battery compartment to check for any protective pull-tabs.
How to fix:
Turn on the switch or remove the pull-tab. No further repairs needed.
1.3 Faulty Dusk-to-Dawn Sensor
Solar lights rely on a photocell sensor to detect darkness. If this sensor fails or becomes dirty, the system might think it’s still daytime and block the light from turning on.
How to check:
Cover the solar panel or sensor completely at night using your hand or a dark cloth. If the light turns on, the sensor was misreading the light level. If not, the sensor may be defective.
How to fix:
Clean the sensor carefully. If cleaning doesn’t solve the issue, replacing the sensor component will likely be necessary.
1.4 Broken Wiring or Loose Connections
Even with a good battery and working sensor, broken or loose wiring can stop the power flow. A disconnected wire between the panel, battery, or LED cuts the circuit. Corroded contacts can also silently break the connection.
How to check:
Gently inspect all visible wires and connections, especially between the solar panel, controller, and LED. Check the battery terminals for corrosion or loose fit. A multimeter can help test wire continuity and check if the panel is delivering power during daytime.
How to fix:
Resecure loose wires, re-solder broken joints, and clean corroded terminals with a bit of white vinegar on a cotton swab. Make sure everything is dry and tightly connected before reassembling.
1.5 Burnt-Out LED or Driver Circuit
While LEDs last a long time, they can eventually fail. A damaged driver circuit — the part that controls power to the LED — can also block light even when everything else is fine.
How to check:
In darkness or with the panel covered, watch closely for any faint flicker or glow. If you’re experienced with electronics, you can briefly test the LED directly with a compatible battery (following the correct voltage and polarity).
How to fix:
Replace the failed LED with an identical model (same voltage and color). If the driver circuit is damaged, repairs can be complex — often requiring part replacement or module swap.
Quick Tip: Test After Repair
After making any repairs, let the unit charge in full sunlight for at least one complete day, then observe its performance over several nights to confirm the issue has been fully resolved; once you’re confident the light is working properly, you’re ready to move on to the next common issue: what to do when your solar light turns on but is too dim or runs out of power too quickly — let’s keep going.
2. Light Is Dim or Has a Short Runtime
Sometimes your solar light turns on fine at dusk, but you notice it’s much dimmer than it used to be, or it only stays on for a few hours before dying out. This usually points to one thing: the system isn’t storing or delivering enough energy to keep the light running. The good news? Most of these issues can be solved with some straightforward checks and fixes.
2.1 Aging or Weak Battery
Rechargeable batteries wear down over time — after hundreds of charge cycles, they lose their ability to hold energy. A battery that once powered a light all night might only last a couple of hours as it ages.
How to check:
Swap the existing battery for a new, fully charged one of the same type. For example, replace a NiMH AA battery with a freshly charged NiMH AA. If the light now runs brighter and longer, the old battery was the issue. You can also check the battery’s voltage with a multimeter: a healthy NiMH battery typically starts at ~1.3 volts, while a failing one drops quickly under use.
How to fix:
Replace the old battery with a new rechargeable battery of the same type, chemistry, and voltage. You can even opt for a slightly higher-capacity (mAh) version if your solar panel can charge it fully during the day.
2.2 Insufficient Sunlight or Charging
Solar lights need about 6–8 hours of direct sunlight daily to charge properly. Shade from trees, buildings, or even seasonal sun angles can dramatically cut charging efficiency.
How to check:
Observe the solar panel’s placement around midday — is it shaded for part of the day? Has a tree grown over or has a new structure appeared nearby? If the light is portable, place it in full, unobstructed sunlight for a day and see if the runtime improves.
How to fix:
Reposition the light or solar panel to maximize sun exposure. Trim back overhanging branches or adjust the panel’s tilt to match your location’s best sun angle. Even a small shift can make a noticeable difference.
2.3 Dirty or Dusty Solar Panel
A dirty solar panel can drastically cut the amount of energy collected. Pollen, bird droppings, or road dust block sunlight, reducing charging.
How to check:
Inspect the solar panel for any visible dirt, cloudiness, or buildup.
How to fix:
Clean the panel gently with a soft, damp cloth and mild soap if needed. Avoid abrasive cleaners, which can scratch the surface. After cleaning, let the panel dry, then place it in sunlight for several hours before testing the light at night.
2.4 Cold Weather Effects
In cold conditions, especially below freezing, battery performance drops. Chemical reactions inside the battery slow down, meaning even a full charge behaves like a half charge.
How to check:
Notice if the dimming problem only occurs during colder months or cold nights.
How to fix:
If possible, insulate the battery compartment or temporarily bring the light indoors during the coldest weeks. Some users store non-essential solar lights during winter to protect the battery. For essential lights, consider using batteries rated for low-temperature performance.
2.5 Undersized System or High Power Load
In some cases, the light may simply be underpowered for its environment — for example, a small solar light used in an area that stays cloudy for long stretches, or a light running in a high-power mode that drains the battery faster than the panel can recharge it.
How to check:
Review the light’s operating modes and settings. Is it on a high-brightness or continuous-on mode? Are you using it in a setting where its design limits are being pushed?
How to fix:
If available, switch the light to a lower brightness or motion-activated mode to extend runtime. If the current light still falls short despite good sunlight and a healthy battery, it may be time to use a larger unit with a bigger panel and battery.
Quick Tip: Test After Repair
After applying any fix — whether it’s cleaning the panel, repositioning it, or replacing the battery — let the unit charge in full sunlight for at least one day. Then monitor its performance over several nights to confirm the problem is resolved.
Next, we’ll cover what to do if your solar light stays on during the day when it’s supposed to turn off. Let’s move on!
3. Light Stays On During Daytime (Fails to Turn Off)
After looking at dim lights, let’s turn to another puzzling issue: a solar light that stays on even when the sun is shining. Normally, solar lights switch off during the day to conserve energy and recharge the battery. If the light stays on 24/7, something is interfering with its ability to sense daylight. Let’s unpack what’s going on, how to check it, and what you can do to solve it.

3.1 Photocell Sensor Failure
Most solar lights use a small photoresistor, or photocell sensor, to detect ambient light. When this sensor fails — whether from age, water damage, or electrical failure — it might always “think” it’s dark outside. As a result, the light stays on day and night, draining the battery prematurely.
How to check:
Locate the photocell sensor, usually visible as a small round component on the light or near the solar panel. Inspect it for dirt, spider webs, or paint that could be blocking light. Gently clean it. You can also perform a test by shining a bright flashlight directly at the sensor during the day — if the light doesn’t turn off or flicker, the sensor may no longer be responding.
How to fix:
If cleaning doesn’t help, replacing the sensor is often the solution. This involves swapping in a new photoresistor with matching specifications, which may require careful soldering.
3.2 Solar Panel Disconnection
In many designs, the solar panel itself acts as the daylight detector. If the panel stops sending voltage to the controller — for example, because of a loose wire or broken solder joint — the system may interpret this as constant darkness.
How to check:
During full daylight, use a multimeter to measure the voltage output from the panel where it connects to the circuit. A small 6V panel, for instance, should output several volts when exposed to sun. If you measure 0V, the panel or its wiring is compromised.
How to fix:
Inspect the panel connections and repair any loose or broken wires by re-soldering or reattaching them securely. If the panel itself is cracked or water-damaged, replacing the panel module will be necessary.
3.3 Sensor Obstruction or Poor Placement
Not every issue is caused by broken components — sometimes, the environment is the culprit. If the sensor or solar panel is installed under a roof overhang, shaded spot, or behind glass that blocks light, it might never receive enough daylight to trigger off.
How to check:
Observe the sensor’s location during the brightest part of the day. Is it partially covered or placed where it can’t “see” the sun properly?
How to fix:
Reposition the light or sensor to ensure it receives clear, unobstructed exposure to daylight. This simple adjustment often restores proper operation.
3.4 Incorrect Mode Settings
Many solar lights come with multiple modes, including manual ON, AUTO, or TEST. If the light was accidentally switched to “always on,” it will ignore daylight entirely.
How to check:
Consult the light’s manual or look for any buttons, switches, or remote controls that adjust the mode. Cycle through the settings, moving from OFF to AUTO, and observe how the light responds.
How to fix:
Make sure the light is set back to AUTO or dusk-to-dawn mode. Reset the unit if necessary by following any included reset instructions.
3.5 Controller Circuit Malfunction
If all else fails, the issue might lie deeper in the control electronics. A stuck transistor or damaged microcontroller can lock the light into an always-on state, regardless of what the sensors or panels report.
How to check:
Carefully open the housing and look for signs of water damage, corrosion, or burnt components on the circuit board. Lightly tug on connections to ensure they’re secure.
How to fix:
Repairing or replacing individual electronic components can be complex and usually requires electronic repair skills. In many cases, replacing the entire controller board (if available) or the full top assembly of the light is the practical route.
Quick Tip: Charge and Observe
Once repairs or adjustments are made, allow the light to sit in full sunlight for a full day, then watch whether it automatically turns off when exposed to daylight. This simple observation confirms whether the fix worked before you move on to other checks.
Next up, we’ll tackle flickering lights — those frustrating cases where the light blinks or turns on and off unexpectedly. Let’s keep the momentum going!
4. Light Flickers or Turns Off Intermittently
Moving along, let’s explore a frustrating problem many encounter: the solar light flickers, blinks unpredictably, or shuts itself off and on. It might seem fine at first but then blinks when touched or swayed by a breeze, or it cuts in and out randomly through the night. While this behavior is annoying, it’s also a clear sign of unstable power delivery — and with careful checks, you can usually track down the source.
4.1 Loose or Corroded Connections
At the top of the list, loose electrical connections or corroded battery terminals often cause flickering. As the light vibrates or the current shifts, weak contact points can momentarily break the circuit, creating that blinking effect.
How to check:
Turn the light off, open the housing, and inspect the battery terminals for corrosion (you might see white or greenish buildup). Confirm the battery sits snugly — gently wiggle it while the light is on (taking care not to short anything) and watch if the flicker responds to the movement.
How to fix:
Clean corroded contacts with a bit of vinegar or baking soda solution, then dry thoroughly. If the battery isn’t fitting tightly, slightly bend the metal contacts to press more firmly against it. For loose wires, re-solder or re-secure them so they hold firmly in place.
4.2 Low Battery Voltage or Fluctuation
Another frequent cause is a battery that’s on its last legs. As it weakens, the battery may barely deliver enough voltage to keep the LED on, triggering a rapid on-off stuttering — especially noticeable late at night after hours of drain.
How to check:
Using a multimeter, measure the battery voltage while the light is operating. Watch if the voltage drops sharply under load (for example, a NiMH battery that should sit at ~1.2V might dip below 1V when the light is on). You can also test by inserting a fresh, fully charged battery and seeing if the flicker disappears.
How to fix:
Replace the old battery with a new rechargeable of the same type and voltage. Be sure to match the chemistry (NiMH, NiCd, or Li-ion) and avoid substituting non-rechargeable batteries, which are unsafe in solar systems.
4.3 Faulty LED or Driver Circuit
In some cases, the problem lies inside the electronics. A damaged LED chip or a failing driver transistor can create irregular current flow, causing flickering that no amount of cleaning or battery replacement will fix.
How to check:
Open the unit and closely inspect the connections around the LED and its driver components. Look for visible cracks, burnt spots, or signs of heat damage.
How to fix:
If you have soldering experience, you can replace a bad LED or faulty driver component. For small garden lights, however, this may not be cost-effective, while larger or more expensive lights may justify sourcing replacement parts or swapping in a new driver board.
4.4 Moisture or Water Ingress
Water sneaking into the electronics can short components or create unpredictable behavior, especially during damp or humid conditions.
How to check:
Look inside the housing for water droplets, condensation, or residue. Check for signs of corrosion on the circuit board or battery contacts.
How to fix:
Dry out the unit thoroughly — you can leave it open in a warm, dry area or use gentle heat (such as a hairdryer on low, held safely away). After drying, clean corrosion if present and reseal the housing using silicone or a proper gasket to improve water resistance.
4.5 Motion Sensor False Triggers (If Present)
For motion-activated models, a malfunctioning PIR (passive infrared) sensor might falsely interpret random movements or temperature shifts as motion, causing the light to rapidly cycle on and off.
How to check:
Observe whether the flickering lines up with motion detection. Cover or block the PIR sensor temporarily to see if the flickering stops.
How to fix:
Adjust the PIR sensor’s angle or sensitivity (if possible) and ensure it’s not facing heat sources like vents or trees that move in the wind. If faulty, the PIR module may need replacement or, alternatively, disabling if continuous dusk-to-dawn operation is acceptable.
Quick Tip: Confirm Stability After Repair
Once you’ve tightened connections, replaced components, or made adjustments, allow the unit to operate undisturbed for a full night cycle. Observe whether the flickering has stopped and the light now runs steadily — a sign that the issue has been resolved.
5. Water Ingress or Physical Damage
Finally, let’s address one of the most damaging issues solar lights face: water intrusion or physical impact. Because these devices sit outdoors year-round, they’re constantly exposed to rain, snow, wind, heat, and accidents. Even if they’re rated as water-resistant, age and weather can wear down seals or introduce cracks, opening the door to failures. If your solar light stopped working after a storm or a knock, here’s how to break down the problem and work toward a solution.
5.1 Rainwater Ingress
Over time, rubber gaskets and silicone seams that once kept water out can degrade, allowing moisture to seep inside. Once water reaches the circuit board or battery compartment, it can short connections, cause immediate failure, or silently set up corrosion that leads to flickering or future breakdowns.
How to check:
Inspect the housing carefully for gaps, cracked seams, or misaligned gaskets. Open the light and look for signs of water — droplets, condensation, or moisture lines. Even if dry now, check for leftover corrosion or mineral deposits around sensitive areas.
How to fix:
Disassemble the unit and let all parts dry completely, ideally using isopropyl alcohol to help displace trapped moisture on circuit boards. Once dry, clean any corrosion from terminals or contacts using a small brush and a mild vinegar or baking soda solution. Before reassembling, reseal the enclosure using weatherproof silicone, paying attention to any gaps or worn seals.
5.2 Corroded Terminals and Connections
When water meets metal inside electronics, corrosion forms — breaking electrical pathways and adding resistance. This can stop the battery from delivering power or prevent proper charging.
How to check:
Look closely at the battery compartment, spring contacts, switches, and solder joints. Corrosion often appears as a green, blue, or white crust on metal surfaces. Unplug or disconnect connectors to check for hidden rust or buildup.
How to fix:
Clean all affected parts carefully, using vinegar or baking soda to neutralize the corrosion and a cotton swab or small brush to restore shiny metal contact surfaces. Severely pitted or damaged contacts may need replacement.
5.3 Cracked or Broken Solar Panel
Physical impacts like hail, falling branches, or accidents can crack the solar panel, damaging its ability to produce power and often creating entry points for water.
How to check:
Examine the panel surface for visible cracks or discoloration under the glass. Use a multimeter in sunlight to test voltage output — if it’s low or zero, the panel is compromised.
How to fix:
If available, replace the panel with a compatible part (matching voltage and current). This may involve soldering the new panel’s wires onto the existing board. For minor cracks, sealing with clear epoxy might provide a temporary water barrier, but power output loss remains.
5.4 Extreme Temperature Damage
Solar lights can also suffer under extreme weather — high heat can warp plastics and loosen seals, while freezing and thawing cycles can crack housings and make plastics brittle.
How to check:
Inspect the casing for warping, brittleness, or small cracks that could let water in. Check if the battery appears swollen or if the LED cover has loosened.
How to fix:
Seal small cracks with weatherproof silicone or clear epoxy. If damage is extensive (such as cracked housings or compromised batteries), replacing affected parts or, in severe cases, the full light may be necessary.
5.5 General Physical Trauma
Lights installed in public spaces or busy gardens can be knocked over, hit by lawn equipment, or even tampered with. Internal components may get jarred loose or wires may break, even if the exterior looks fine.
How to check:
Carefully open the light and examine internal connections, paying attention to solder joints, wiring, and the mounting of major components. Look for wires that are dislodged or connectors that are loose.
How to fix:
Re-secure or re-solder any loose wires, ensure connectors are snug, and reinforce vulnerable attachment points. After repairs, consider relocating the light or adding physical protection to reduce future impact risk.
Quick Tip: Reinforce Against Future Damage
Once repairs are complete, take preventive measures: apply a thin coat of silicone grease to battery terminals, reseal housing gaps, and ensure the unit is elevated or well-drained to avoid water pooling. After severe weather, do a quick check — catching minor issues early can save you from major repairs later.
Summary
We’ve covered the five main reasons solar lights fail — from dead batteries and charging issues to sensor faults, loose connections, and water damage. With the right checks and simple fixes, most problems can be solved quickly.
Regular maintenance, like cleaning panels, replacing old batteries, and checking seals, keeps your lights working reliably and shining bright year after year.